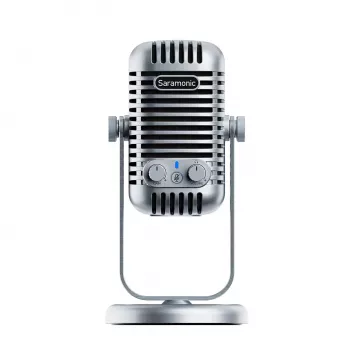
USB Desktop Mic Setup for Clear Calls, Streams & Podcasts
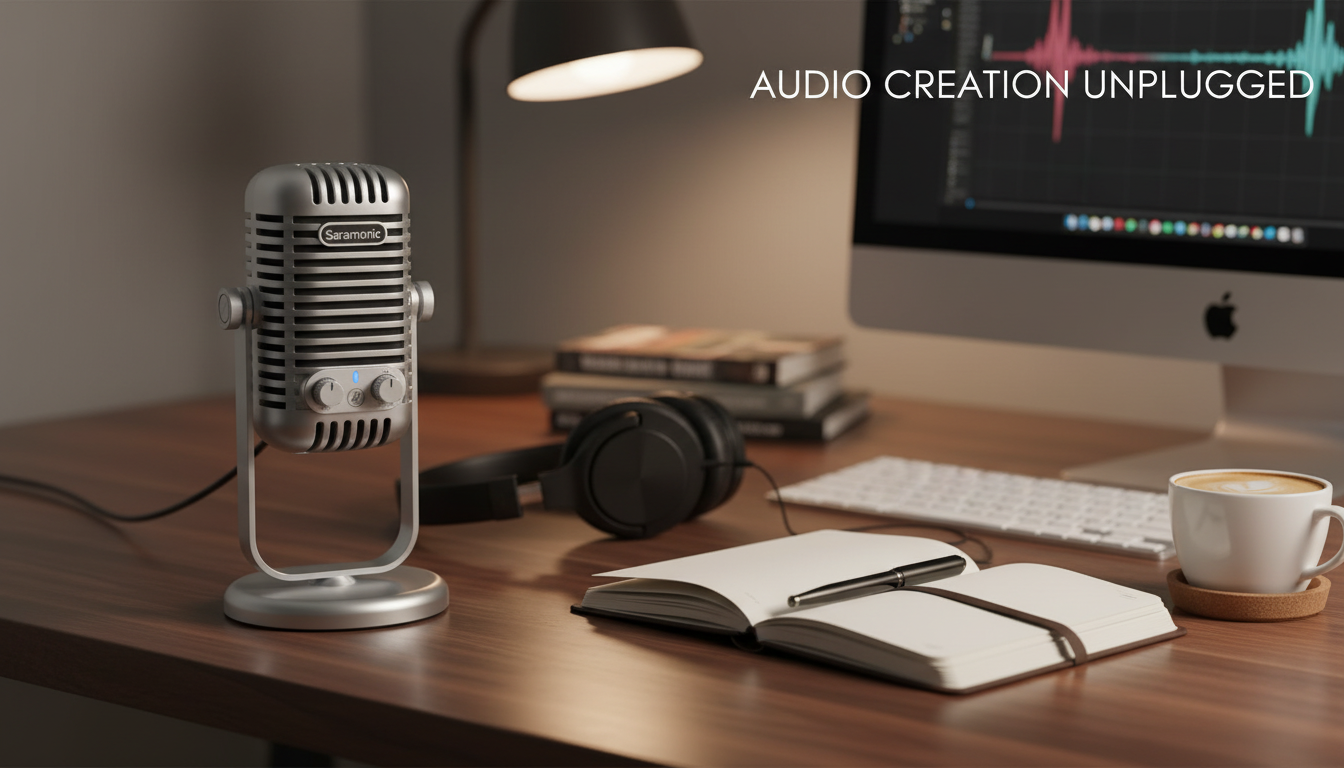
USB Desktop Microphone for Clear Podcasting, Streaming, Recording & Online Meetings
A USB desktop microphone can make voices sound fuller, cleaner, and easier to understand—without extra audio gear. With the right placement and a quick level check, it can noticeably reduce “thin” laptop-mic sound, uneven volume, and distracting room echo. Below is a practical guide to what improves immediately, which features matter most, and how to get consistently clear audio for podcasts, live streams, voiceovers, and day-to-day calls.
What a USB Desktop Microphone Improves Right Away
- Speech clarity: Better definition on consonants so listeners don’t need to strain.
- Consistency: Steadier volume compared with many headset mics or built-in laptop mics.
- Lower room distractions: Closer placement helps reduce keyboard noise and echo.
- Faster workflow: Plug in via USB, select it in the app, and start recording.
- Versatility: Works for voice chat, meetings, streaming, and basic music/voiceover capture.
Who This Microphone Fits Best
- Podcasters who want a simple desktop setup that sounds professional with minimal tweaking.
- Streamers who need speech to stay present over game audio and alerts.
- Remote workers who want fewer “you’re cutting out” moments and clearer meeting audio.
- Students and creators recording presentations, tutorials, narration, or interviews.
- Upgraders moving beyond a built-in laptop mic without stepping up to an XLR interface.
Key Features to Look For (and Why They Matter)
- Pickup pattern: Cardioid-style capture focuses on the front and helps reduce room noise from behind.
- Monitoring: A headphone output (if included) helps you hear exactly what’s being captured without delay.
- Gain control: Makes it easier to match levels across soft and loud speakers.
- Mute button: Quick privacy and anti-cough protection during live calls and streams.
- Sturdy desk stand: Stability reduces thumps and rumbles from desk movement.
- Compatibility: Reliable plug-and-play support for common apps on Windows/macOS (and sometimes tablets).
Quick Setup for Meetings, Streaming, and Recording
- Connect the microphone directly to a computer USB port (avoid unpowered hubs if possible).
- Set the microphone as the input device in system audio settings and inside the app (Zoom/Teams/Discord/OBS/Audacity).
- Start with input level around the middle, then speak at normal volume and adjust until peaks stay controlled.
- Position the mic 6–10 inches from your mouth; angle slightly off-center to reduce plosives (P/B sounds).
- Do a 10-second test recording and listen for clipping, echo, or keyboard noise before going live.
For app-specific checks, it helps to follow the built-in test tools: Zoom’s guidance on testing audio before a meeting and Microsoft’s steps to change microphone settings in Teams can save time when your system has multiple inputs.
Placement and Room Tips That Make the Biggest Difference
- Keep the mic close: Doubling the distance can dramatically increase room sound and reduce clarity.
- Aim away from noise: Point the mic’s rear toward fans, PCs, or loud keyboards when possible.
- Control reflections: Add a rug, curtains, or a soft blanket behind the mic to cut harsh echo.
- Reduce desk vibrations: Avoid tapping the desk; placing the stand on a mouse pad or soft mat can reduce low rumbles.
- Use a pop filter or foam windscreen: Helpful for close-mic podcast speech if plosives are an issue.
Recommended Settings for Common Use Cases
| Use case | Mic distance | Input level target | Helpful add-ons |
|---|---|---|---|
| Online meetings | 8–12 in | Peaks around -12 to -6 dB | Mute button, light noise suppression |
| Streaming | 6–10 in | Peaks around -10 to -6 dB | Compressor, noise gate (gentle) |
| Podcast recording | 6–8 in | Peaks around -12 to -6 dB | Pop filter, basic EQ in post |
| Voiceover | 6–10 in | Peaks around -12 to -6 dB | Soft room treatment, careful de-noise |
When recording to a DAW or editor, Audacity’s documentation on recording is a useful reference for device selection and level setup.
Common Problems and Fast Fixes
Product Spotlight: USB Desktop Microphone for Podcasting, Streaming, Recording & Online Meetings
USB Desktop Microphone for Podcasting, Streaming, Recording & Online Meetings is built for straightforward, plug-and-play desktop use across common communication and recording apps. It’s a practical choice for creators and remote workers who want clearer voice capture without adding an audio interface, and it pairs well with simple upgrades like a pop filter and basic room softening for a noticeable jump in clarity.
To make the setup feel permanent (and easier to repeat day after day), consider designating a dedicated corner or small workspace where the mic can stay positioned consistently. A cozy, consistent spot can also reduce background surprises during calls and recordings; the Ultimate Breakfast Nook with Banquette Seating Guide offers ideas for building a comfortable corner that can double as a calm, seated work-and-record area with softer surfaces and fewer hard reflections.
FAQ
Does a USB desktop microphone work with Zoom, Teams, and Discord?
Yes—most USB desktop microphones are plug-and-play on Windows and macOS. Select the microphone as the input in your system sound settings and again inside Zoom, Teams, or Discord, then run a short test call; you may also need to allow microphone permissions in your OS privacy settings.
How close should the microphone be for podcast-quality voice?
Start around 6–10 inches from your mouth and angle slightly off-axis to reduce plosives. Moving closer usually reduces room echo but can increase P/B bursts, so add a pop filter or windscreen if those sounds are prominent.
Why does my voice sound echoey even with a good microphone?
Echo usually comes from mic distance and room reflections rather than mic quality. Move the mic closer, use headphones to prevent speaker bleed, and add soft furnishings (curtains, rugs, blankets) to reduce reflected sound.


Leave a comment